
Bricklaying inside a bright workshop or shed can be a rewarding DIY project, especially when the work is carefully planned and executed. Whether creating a small feature wall, workbench base, garden structure, or decorative masonry project, accurate layout and proper brick placement are essential. Here is a 12-step process.
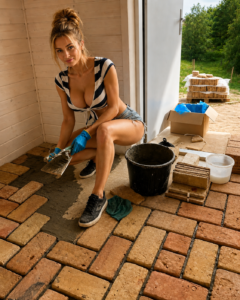
Step 1: Plan the Brickwork
Decide what structure or wall will be built inside the shed. Measure the available space and prepare a simple layout showing the height, width, brick pattern, and any openings.
Step 2: Prepare the Shed
Clear the work area of unnecessary tools, materials, and debris. Make sure there is sufficient lighting and ventilation, especially when mixing mortar. Protect nearby surfaces from dust and mortar splashes.
Step 3: Gather Materials and Tools
Prepare the required bricks, mortar materials, water, trowel, level, tape measure, string line, bucket, jointer, and other appropriate equipment. Keep everything organized within easy reach.
Step 4: Prepare the Base
Inspect the surface where the first course will be installed. It should be stable, clean, and reasonably level. Repair weak or uneven areas before beginning the brickwork.
Step 5: Measure and Mark the Layout
Mark the starting line and wall boundaries using a tape measure, square, and level. Check the dimensions carefully so the finished brickwork fits correctly within the shed.
Step 6: Mix the Mortar
Prepare the mortar according to the manufacturer’s instructions or the project’s specified mix. Add water gradually and mix until a consistent workable texture is achieved.
Step 7: Lay the First Course
Spread a suitable mortar bed along the prepared base. Position the first brick carefully and check it with a level. Continue placing the first course while maintaining consistent joints.
Step 8: Establish the Brick Pattern
Use a string line or suitable guide to maintain a straight course. Stagger the vertical joints between rows according to the selected bond pattern. Check each brick before the mortar sets.
Step 9: Build Additional Courses
Continue building the wall one course at a time. Apply consistent mortar to the horizontal and vertical joints and remove excess mortar with the trowel as the work progresses.
Step 10: Check Alignment Frequently
Regularly use a level and straightedge to check that the wall remains plumb, straight, and level. Correct small errors immediately before they become difficult to fix.
Step 11: Finish the Joints
When the mortar reaches the appropriate working condition, use a suitable jointing tool to shape and smooth the joints. Remove loose mortar and clean the brick faces carefully.
Step 12: Complete and Inspect the Project
Allow the brickwork to cure according to the mortar requirements. Inspect the completed wall for loose bricks, uneven joints, cracks, or alignment problems. Clean the surrounding shed and organize the tools after the project is finished.
A sunlit shed can provide an enjoyable environment for a DIY bricklaying project, while natural light makes it easier to inspect alignment and surface details. With accurate measurements, proper mortar preparation, stable brick placement, and careful finishing, even a small workshop project can achieve a clean and professional appearance.



