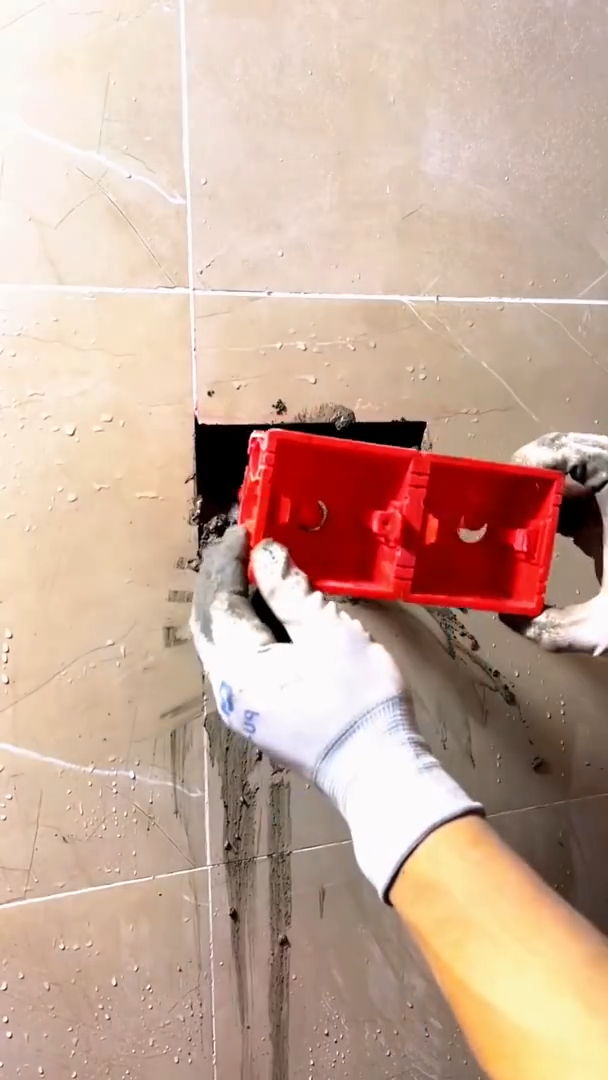
Installing an electric box on an interior tile wall may seem like a simple task, but achieving a flawless result requires patience, precision, and the right technique. Unlike drywall, tile is a hard and brittle material that can easily crack if drilled or cut incorrectly. That’s why experienced electricians and construction professionals always take extra care when working on tiled surfaces.
Whether you’re installing a new electrical outlet in a kitchen, adding a switch in a bathroom, or preparing wiring for a wall-mounted appliance, the process begins long before the first hole is drilled. Every measurement, every cut, and every connection plays an important role in creating an installation that is not only safe but also visually appealing.
The beauty of a professional installation is that the finished electrical box looks like it has always been part of the wall. The cover plate sits perfectly against the tile, the wiring remains completely hidden, and everything functions smoothly for years to come.
Every Great Installation Starts with a Plan
Professional installers never rush into cutting tile. The first step is always planning.
The ideal location must provide convenient access while avoiding hidden plumbing, structural supports, or existing electrical wiring. Careful measuring ensures the outlet or switch aligns perfectly with cabinets, countertops, mirrors, or other architectural features.
Taking a few extra minutes to plan can save hours of repair work later.
Selecting the Right Electrical Box
Not every electrical box is suitable for every project.
Depending on the wall construction, installers may choose a plastic remodel box, a metal junction box, or a heavy-duty electrical enclosure designed for special applications.
The box must provide enough room for wiring connections while fitting neatly inside the wall cavity. Choosing the proper size also helps improve airflow around electrical components and simplifies future maintenance.
Protecting the Beautiful Tile Surface
Interior tiles are often one of the most expensive finishes in a room. Whether made from ceramic, porcelain, marble, or natural stone, every tile deserves careful handling.
Before drilling begins, professionals apply painter’s tape over the cutting area. The tape helps reduce drill bit movement and lowers the chance of surface chipping.
Measurements are checked repeatedly because once the tile has been cut, there is no easy way to reverse the process.
Precision Drilling Makes the Difference
One of the most satisfying moments in the installation process is watching a perfectly clean opening appear in the tile.
Using diamond drill bits specifically designed for tile, installers slowly create pilot holes while maintaining consistent pressure. Instead of forcing the drill, they allow the cutting edge to gradually remove material.
Patience is the secret.
Working too quickly generates excessive heat and vibration, increasing the risk of cracked tiles.
Many professionals occasionally spray water onto the drill bit to keep it cool and improve cutting performance.
Cutting the Opening
After the pilot holes have been completed, the opening for the electrical box is carefully shaped.
Some installers use an angle grinder fitted with a diamond blade, while others prefer specialized tile-cutting tools depending on the project requirements.
Each cut is made slowly to maintain smooth edges that will later be hidden beneath the outlet cover plate.
A clean opening not only looks better but also allows the electrical box to fit securely without unnecessary adjustments.
Preparing the Wall
Behind the tile lies the wall structure, which must also be prepared.
Drywall, cement board, or masonry is carefully removed to match the dimensions of the electrical box.
The installer checks once again for hidden utilities before proceeding.
This careful approach helps prevent accidental damage to water pipes or electrical cables hidden inside the wall.
Running the Electrical Cable
With the opening complete, the electrical cable is routed to the new box location.
The cable is secured properly to prevent movement inside the wall while leaving enough extra length for comfortable wiring connections.
Neat cable management makes the installation easier to inspect and simplifies future repairs if needed.
Professional electricians always leave the workspace looking organized rather than crowded with tangled wires.
Mounting the Electrical Box
The electrical box is gently inserted into the prepared opening.
Adjustment is sometimes necessary to ensure the front edge sits perfectly flush with the finished tile surface.
Once aligned, the mounting brackets or retaining clips are tightened evenly.
The result is a solid foundation capable of supporting outlets, switches, smart home devices, or charging stations without movement.
Making Strong Electrical Connections
Inside the electrical box, attention shifts to the wiring.
Each conductor is stripped to the proper length before being connected to its designated terminal.
Loose connections generate heat over time, so professionals carefully tighten every terminal while ensuring no bare wire remains exposed.
Once complete, the wires are folded neatly into the back of the box, creating a clean and organized installation.
Good workmanship is often invisible—but it makes all the difference.
Installing the Outlet or Switch
The outlet or switch is attached using the mounting screws provided by the manufacturer.
Installers check alignment several times before fully tightening the screws.
A crooked outlet immediately stands out against straight tile grout lines, making precision especially important.
Finally, the decorative cover plate is installed, giving the entire project its finished appearance.
Testing Before Completion
No professional installation is complete without testing.
After restoring electrical power, the installer verifies that every function operates correctly.
Outlets are tested for correct polarity, grounding, and voltage.
Switches are checked to ensure they control the intended fixtures without flickering or loose connections.
Only after successful testing is the project considered complete.
Common Mistakes to Avoid
Many installation problems occur because people rush through the process.
Using ordinary masonry drill bits instead of diamond bits often causes tile damage.
Skipping measurements can leave outlets uneven or poorly positioned.
Over-tightening screws may crack the tile or deform the electrical box.
Ignoring local electrical regulations can create serious safety risks and inspection failures.
Professional installers avoid these mistakes by following established procedures from beginning to end.
Why Professional Workmanship Matters
A professionally installed electrical box offers more than reliable electrical performance.
It enhances the overall appearance of the room.
The outlet blends naturally into the tile design.
The cover plate sits perfectly flat.
The wiring remains protected.
Future maintenance becomes much easier.
Most importantly, the installation provides long-term safety for the building and everyone who uses it.
Whether the project involves a luxury bathroom, a modern kitchen, a hotel renovation, or a commercial office, quality craftsmanship always produces lasting results.
Final Thoughts
The installation of an electric box on an interior tile wall is a perfect example of how construction combines technical knowledge with skilled craftsmanship. Every stage—from careful planning and precise drilling to secure wiring and final testing—requires attention to detail.
When completed correctly, the finished outlet or switch appears clean, level, and professionally integrated into the tiled wall. It not only provides dependable electrical service but also preserves the beauty of the surrounding finish.
The best installations are the ones people rarely notice. They simply work—day after day, year after year—while maintaining the polished appearance of the space. That’s the hallmark of true professional workmanship.



